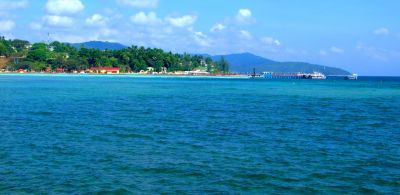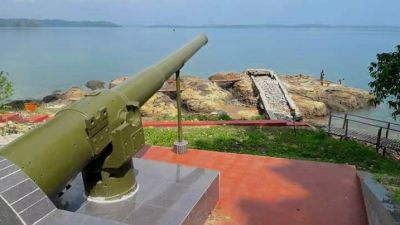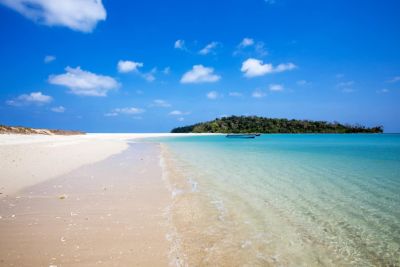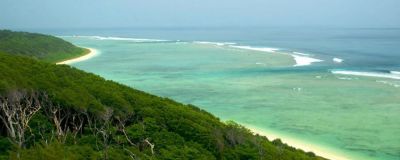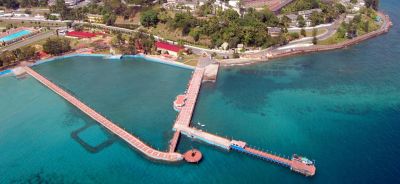
Andaman Photography Archives
If you are planning a photography-focused trip to the Andaman Islands, this guide will help you build a useful visual archive rather than just collect random holiday snaps. From turquoise bays and limestone caves to colonial ruins and market scenes, Andaman gives you a wide range of subjects across a short, easy-to-manage itinerary. By the end, you will know where to shoot, when to go, how much time to keep aside, and how to plan your days for the best light.
Why Andaman Works So Well for a Photography Trip
Andaman is one of those places where the scenery changes quickly without making you travel long distances. In a single trip, you can photograph ferry harbours in Port Blair, wide beaches on Havelock, mangroves on Baratang, and quieter island life on Neil. For Indian travellers, this means you can create a strong travel archive even if you have only 5-7 days.
The best part is the variety. You are not limited to one kind of frame. You can shoot seascapes, portraits, local food, street details, sunrise silhouettes, reef textures, and heritage architecture. If you love editing later, Andaman gives you images that hold up well in albums, blogs, social media carousels, and print collections.
Best Islands and Locations for Photographers
For a practical photography plan, focus on a few key zones rather than trying to cover everything. Most first-time visitors base themselves in Port Blair and add Havelock and Neil Island, with Baratang as a day trip if conditions allow.
Port Blair for history, docks, and everyday scenes
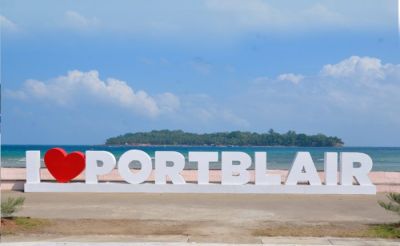
Port Blair is not just a transit point. It is where you can photograph the Cellular Jail, the old colonial-era streets around Aberdeen Bazaar, busy jetties, and sunset views from Corbyn’s Cove. The city works well for documentary-style photography because it gives you people, movement, and heritage in one place. Keep 1-2 days here, especially if you want to shoot at a slower pace after your flight.
Havelock Island for beaches and clear-water frames
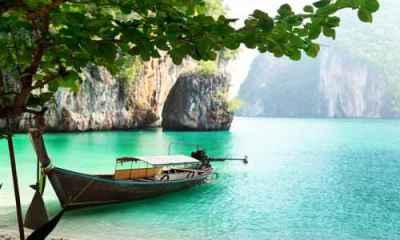
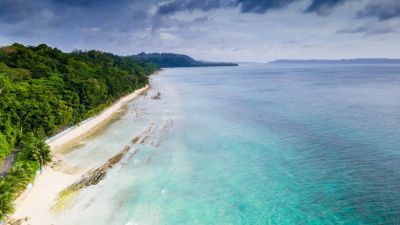
Havelock Island, now officially Swaraj Dweep, is the most popular stop for seascapes. Radhanagar Beach is the classic wide-angle subject, while Elephant Beach is better for action, water colour, and boat-based perspectives. If you like early morning photography, Havelock rewards you with quieter beaches before the day tours begin. Plan at least 2 nights here.
Neil Island for calm compositions
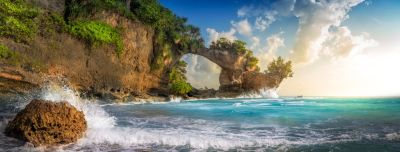
Neil Island, now Shaheed Dweep, is ideal if you prefer less crowded frames. Laxmanpur Beach, Bharatpur Beach, and Natural Bridge give you a mix of coastal texture, tide pools, and layered rock formations. The island is smaller and easier to cover than Havelock, so it is useful for travellers who want a slower visual rhythm. One full day or 1 night is usually enough for a compact shoot.
Baratang for mangroves and limestone caves
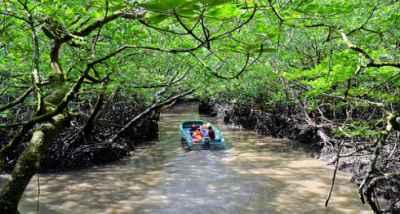
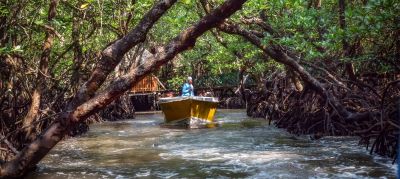
Baratang is a strong choice for landscape and travel photographers who want something different from the beaches. The journey itself is part of the story, with forested roads, mangrove creeks, and ferry crossings. The limestone caves are a good subject, though lighting inside is limited and you should be ready for uneven surfaces. Because road and convoy conditions can affect timing, keep this as a flexible day trip and confirm logistics locally before leaving.
When to Visit for the Best Light and Weather
The most reliable months for photography in Andaman are usually October to May, with clear skies and calmer seas in many periods. December to February is especially popular because the light is crisp and the humidity is lower. April and May can still work well, though the heat rises and you will need earlier starts.
The monsoon season, roughly June to September, brings heavier rain, rougher water, and more schedule changes. You may still get atmospheric shots, but ferries and boat trips can become unpredictable. If your goal is a clean, well-planned photo archive, the dry season is easier to work with. Always confirm current weather, ferry schedules, and any route changes before booking.
How to Structure a Photography Itinerary
A simple route works best for most visitors. You do not need to chase every island. A balanced 6-day plan usually gives you enough variety without turning the trip into a rush.
| Trip Pattern | Suggested Stay | What You Can Photograph | Approx. Style |
|---|---|---|---|
| Short Trip | 3-4 days | Port Blair + one island | Fast, focused, beach-heavy |
| Standard Trip | 5-7 days | Port Blair + Havelock + Neil | Balanced archive, best for first-timers |
| Extended Trip | 8-10 days | Add Baratang or more slow days | More diversity, better for detailed storytelling |
If you are serious about building a photographic record, avoid filling every day with long transfers. A good pattern is one heavy travel day, one active shoot day, and one lighter day to edit, back up files, and revisit the same beach at a different time.
Best Photography Subjects in Andaman
Seascapes and shoreline textures
Andaman’s beaches are not just about the horizon line. Look down as much as you look ahead. Wet sand, shells, driftwood, wave patterns, and palm shadows often make stronger close-up compositions than the wide beach shot everyone else takes. Early mornings are particularly useful because the sand is clean and the foot traffic is low.
Ferries, harbours, and island movement
The ferry experience is a useful visual thread in your archive. Jetties in Port Blair and the movement between islands can give you candid frames of luggage, local travellers, and the daily rhythm of island life. Keep your camera ready during boarding and disembarking because the best frames often happen quickly.
Heritage and street details
The Cellular Jail is the most recognisable heritage subject in Andaman, but do not stop there. Older corners of Port Blair, market stalls, roadside signboards, and fishermen’s activity give your portfolio more depth. If you are creating an editorial-style travel archive, these details are important because they make the trip feel lived-in, not staged.
People and food
Portraits and food shots help balance all the landscape photos. Try seafood plates, coconut-based dishes, tea stalls, and market snacks in Port Blair and the island towns. Always ask before taking close portraits of people, especially in quiet local settings. A respectful approach will usually get you a better photograph anyway.
Time of Day: How to Get Better Frames
In Andaman, light changes the mood of a place very quickly. Beaches look best in early morning and late afternoon, when the water colour is softer and shadows are not harsh. Midday can still work for bright reef tones or documentary shots, but it is usually the least forgiving time for portraits and open sand scenes.
Sunrise is ideal at Radhanagar, Laxmanpur, and less crowded stretches of beach. Sunset is useful for silhouettes, jetty scenes, and calm sea reflections. If your schedule allows, return to the same location twice in one day. You will often get two completely different looks from the same beach.
Practical Travel and Budget Notes for Photographers
Andaman is not difficult to manage, but photography gear needs a little extra care in salt air and humidity. Carry a rain cover, silica gel packets, microfiber cloths, and a zippered bag for batteries and memory cards. If you are carrying a drone, check the latest local rules and flight permissions before you pack it. Rules can change, and it is better to verify than assume.
For a photography trip, your budget may look something like this: decent hotels can range from ?2,500-?8,000 per night depending on island and season, ferry and inter-island transfers can add a meaningful share to your total, and boat activities may be priced separately. Food is fairly manageable, with simple meals starting around ?300-?600 per person and nicer seafood dinners costing more. These are indicative ranges only, so confirm current prices before booking.
Also keep some cash handy. While cards and digital payments are accepted in many places, small vendors, local transport options, and certain excursions may still prefer cash or have weak connectivity.
Equipment and Packing Tips
- Carry two lenses if possible: one wide-angle for beaches and one mid-range zoom for portraits, boats, and details.
- Protect against moisture: use silica gel, a dry pouch, and a simple lens cloth for salt spray.
- Pack light: ferries, cabs, and beach walks are easier when you are not carrying a heavy bag.
- Take extra batteries: long boat rides and full-day shoots can drain power faster than expected.
- Back up daily: copy files to a laptop or portable drive every evening.
If you like long exposure photography, a small tripod can help with beach scenes and low-light harbour shots. Just keep it practical, because bulky gear becomes tiring in island travel.
Suggested 6-Day Photography Route
- Day 1: Arrive in Port Blair, shoot Cellular Jail exterior, Aberdeen Bazaar, and a sunset at Corbyn’s Cove.
- Day 2: Take an early ferry to Havelock, photograph beaches and jetty scenes, and stay overnight.
- Day 3: Sunrise at Radhanagar Beach, relaxed afternoon, and one more coastal session at golden hour.
- Day 4: Visit Elephant Beach or shoot a slower day in Havelock with local movement and shoreline details.
- Day 5: Move to Neil Island, focus on Laxmanpur and Bharatpur, and shoot sunset compositions.
- Day 6: Return to Port Blair or add Baratang if the route and timings suit your plan.
Frequently Asked Questions
Is Andaman good for beginner photographers?
Yes, it is very beginner-friendly because many locations are easy to access and visually rewarding without advanced techniques. The light, water, and open spaces make it easier to get attractive results even with a basic camera or a good phone. Just keep an eye on cleanliness of lenses and don’t overpack your schedule.
Can I use a phone camera for Andaman photography?
Absolutely. Modern phone cameras do very well with beach scenes, sunsets, food, and travel details. Use the phone’s HDR setting carefully and avoid zooming too much, since quality drops fast when you crop digitally. Clean your lens before every shoot because salt spray and fingerprints are common.
How many days are enough for a photo trip in Andaman?
Five to seven days is a comfortable range for a first trip. That gives you enough time for Port Blair, Havelock, and Neil without feeling rushed. If you want Baratang and a slower archive, plan closer to 8-10 days.
What is the best month for beach photography in Andaman?
October to March is usually the most dependable period for clear skies and calmer conditions. December to February often gives the most comfortable shooting weather. Still, conditions can vary, so confirm forecasts and ferry schedules before you travel.
Are permits needed for photography in Andaman?
For most common tourist photography, you usually do not need a special permit. However, drone use, protected areas, and some restricted locations can have separate rules. It is wise to check locally before your trip because regulations and access conditions can change.
Conclusion
Andaman gives you more than postcard shots. It offers an easy route to build a varied photography archive with beaches, heritage sites, street life, ferries, and quiet island moments all in one trip. If you plan around light, keep your itinerary realistic, and leave room for slow exploration, you will return with images that feel connected rather than repetitive.
If this guide helped you plan your Andaman photography trip, please share this post with someone who is packing a camera for the islands.
Disclaimer : The information provided in this blog is for general informational purposes only. While we strive to keep the content accurate and updated, TravelSetu assumes no liability for errors or omissions. If you believe any part of this blog infringes your rights or causes concern, please notify us immediately at info[at]travelsetu[dot]com so that appropriate action can be taken.